Setting up a coal forge can be a rewarding and practical endeavor for blacksmiths and metalworkers. A coal forge provides a traditional and efficient method for heating and shaping metal. While the process may seem daunting at first, with the right guidance and tools, you can create a functional coal forge in no time. From selecting the right location to assembling the necessary equipment, this guide will walk you through the steps to set up a coal forge successfully.
Choosing the Location
Selecting the right location for your coal forge is crucial for both safety and efficiency. Ideally, you should place your forge in a well-ventilated area, preferably outdoors to prevent the buildup of harmful fumes. Ensure that the location is free from any flammable materials and has enough space for you to move around comfortably. Additionally, consider installing a fireproof surface, such as concrete or bricks, to protect the ground from heat damage.
Assembling the Forge
To set up a coal forge, you will need a few essential components, including a firepot, tuyere, and blower. The firepot serves as the container for the burning coal, while the tuyere is a pipe that delivers air to the fire to increase its temperature. The blower is used to regulate the airflow and control the intensity of the fire. You can either purchase a pre-made coal forge or build one from scratch using readily available materials.
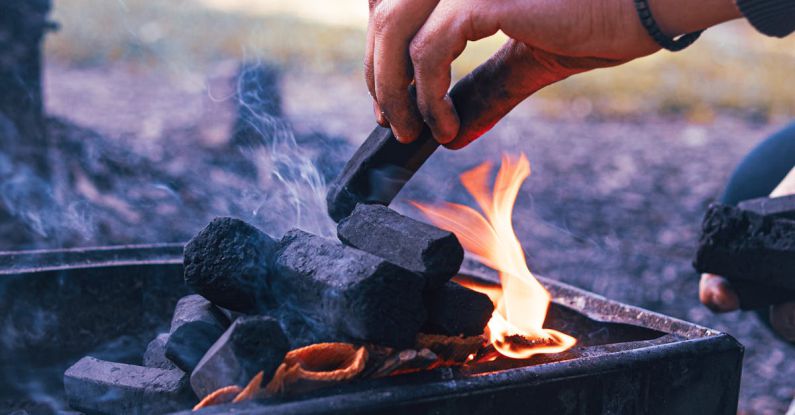
Preparing the Coal
Before lighting up your forge, it is essential to prepare the coal properly. Start by selecting high-quality bituminous coal, as it burns cleaner and hotter compared to other types of coal. Break the coal into small pieces to ensure even heating and place it in the firepot. Remember to leave some space at the top of the firepot to allow for proper airflow. Once the coal is in place, you can ignite it using a small amount of kindling or a propane torch.
Maintaining the Fire
Once the coal is burning steadily, it’s time to start forging. Adjust the airflow using the blower to control the temperature of the fire. A well-maintained coal forge should have a consistent and uniform heat distribution to ensure optimal metalworking conditions. Keep an eye on the fire and add more coal as needed to maintain the desired temperature. Remember to wear appropriate safety gear, such as heat-resistant gloves and goggles, to protect yourself from sparks and hot metal.
Troubleshooting Common Issues
While setting up a coal forge is relatively straightforward, you may encounter some common issues along the way. If you notice that the fire is too hot or too cold, adjust the airflow by manipulating the blower settings. In case the coal is not burning efficiently, check for any blockages in the tuyere or firepot and remove them promptly. It’s essential to stay vigilant and address any problems that arise to ensure a smooth forging process.
Exploring Advanced Techniques
Once you have mastered the basics of setting up a coal forge, you can start experimenting with more advanced techniques to enhance your metalworking skills. Consider trying different types of coal or adding flux to your forge to achieve specific results in your work. Additionally, you can explore various forging methods, such as drawing out, bending, and twisting, to create intricate and unique pieces.
In conclusion, setting up a coal forge is a rewarding and practical endeavor that can elevate your metalworking craft to new heights. By following the steps outlined in this guide, you can create a functional coal forge that will serve as the heart of your workshop. Remember to prioritize safety, proper maintenance, and continuous learning to unlock the full potential of your forge. So, gather your tools, ignite the fire, and let your creativity and passion for metalworking take center stage in your forge.